
A clamp meter is, although, not a complicated instrument; yet we have to understand its usage. Because the use of clamp meters has immensely increased nowadays.
A clamp meter is equally popular among professionals and non-professionals. Professional electricians and engineers know how to use a clamp meter, but when it comes to non-professionals, things do not go as planned.
In simple terms, we toggle for our corresponding current (AC/DC) and select our expected range (for manual selection). After that, we adjust the jaw of the clamp meter around the current carrying wire. Within a few seconds, the value of the current will appear on display.
The process as mentioned earlier is applied for a simple clamp meter. Nowadays, we have technologically advanced clamp meters with much more applications.
Here, we will discuss the basic operation of a clamp meter. We will discuss the step-by-step process of measurement through a clamp meter.
So stay with us till the end…
How to use a clamp meter?
The usage of a clamp meter is straightforward. All we have to understand the basic function of a clamp meter to operate it.
Let’s discuss the detailed procedure for utilizing a clamp meter to measure current.
Using a clamp meter
Using a clamp meter is too easy as compared to the multimeter. Every person dealing with electronics can use a clamp meter.
However, we should keep in mind that dealing with electronics without prior knowledge is dangerous. So we are going to tell you how to use it step by step.
Without wasting time, let’s delve into these steps…
Step-by-step use of a clamp meter
To use a clamp meter properly, a user should take the following steps.
Step 1: Assess the clamp meter
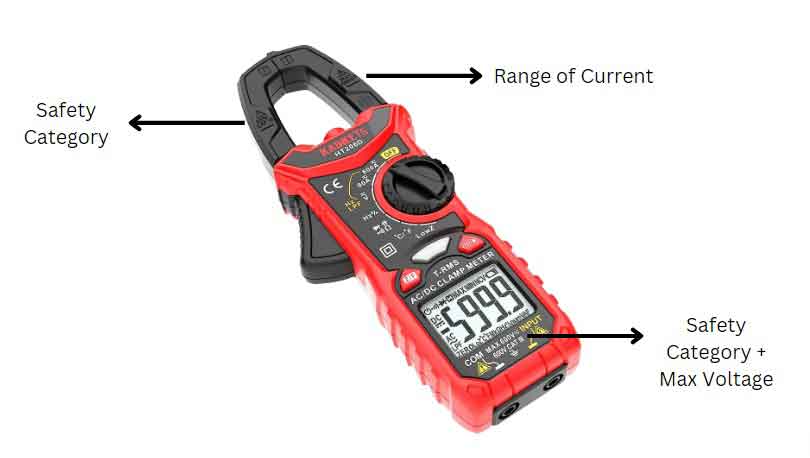
Always check the range and safety category of a clamp meter before using it. Commonly, these readings are available on the Jaw clamp of a clamp meter.
If you do not find these two readings in the jaw of the clamp meter, notice it between the female shoe of probes.
Once you get the idea, you are aware of the capability of the clamp meter. Calculate the situation carefully.
Check if the probes are connected correctly. Often, a clamp meter has three places for probes. Each assembly is dedicated to certain variables.
However, this confusion has been erased by shifting from three to two female probes
Step 2: Ready your clamp meter
Power on the clamp meter. Before doing another step, make sure that the clamp meter is ready for further action, and also check for the above steps.
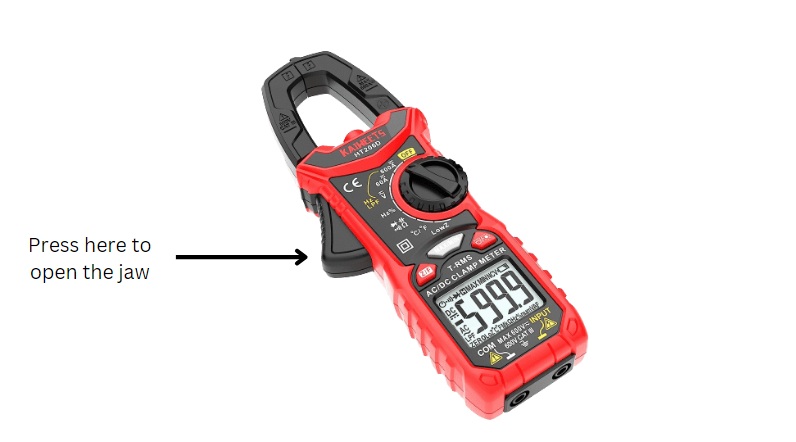
Step 3: Open the Clamp jaw properly
There is an outing for opening the jaw of the clamp. Press that to open the jaw.
You may have a different type of clamp meter without a jaw clamp. They are provided with cable or another assembly of the conductor.
Follow the steps mentioned in the guidance book of the clamp meter.
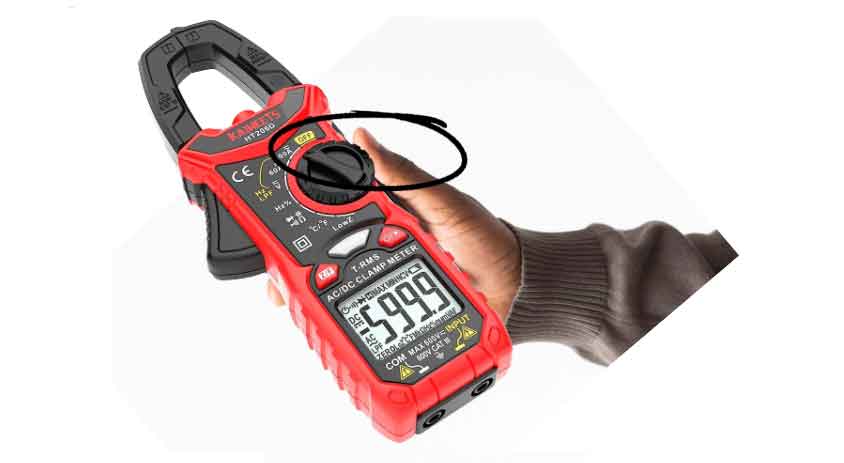
Step 4: Pick the correct parameter
Use control buttons or knobs to select the corresponding variable. Generally, the selection is made between AC/DC, range, or other variables.
However, the prime purpose of the clamp meter is to measure current.
Step 5: Place the jaw around the wire
Adjust the jaw around the current carrying wire. Keep the position of the wire in the center of the jaw.
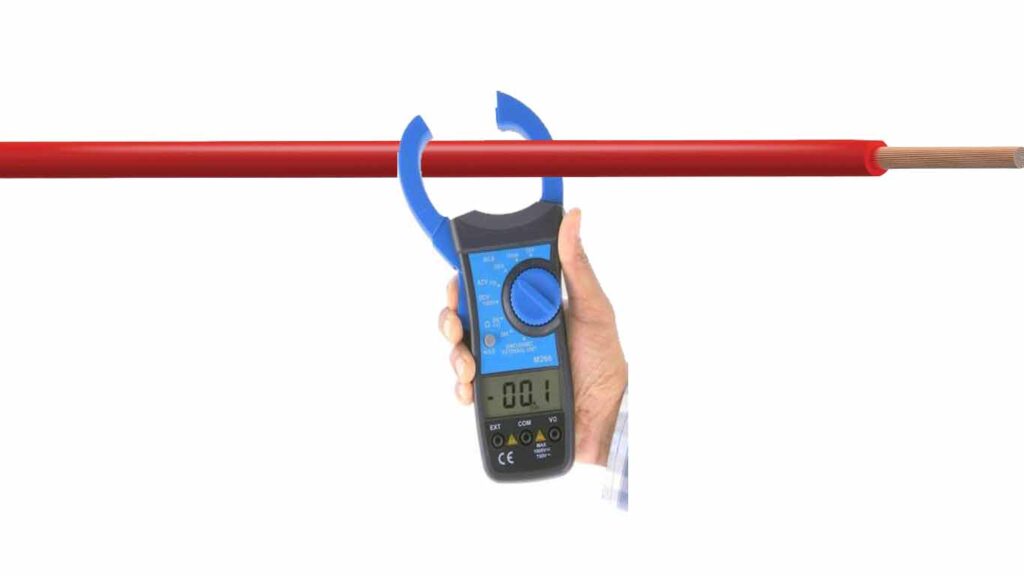
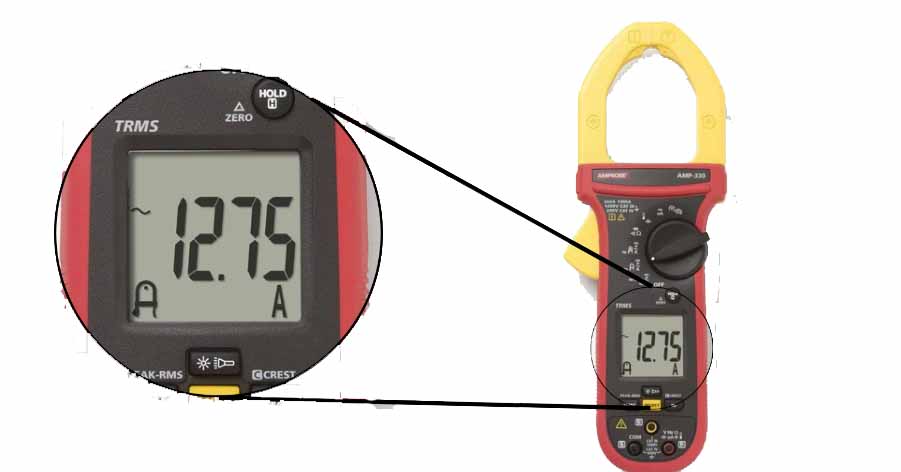
Step 6: Wait for your reading
Now the corresponding value will appear on the display of the clamp meter.
Things to avoid
While using a clamp meter, we should avoid certain acts that can cause error, damage, and harm. Often these acts are considered minor and ignored.
1. Opening jaw by hands
Be advised, to always open the clamp jaw from the facility available. We have already mentioned this above.
Under-knowledge, folks open the clamp jaw with their hands. This act can cause the following damages.
- Increases the chances of getting an electric shock
- Misplaces the physical connectivity of the clamp jaw
- This act can break the clamp jaw
- The conductor might be exposed to hands-affecting reading
- The internal circuitry can be damaged
2. Not selecting the required parameter
Before the measuring, please check the control knob and probe. If we ignore it, we can land on faulty reading.
Moreover, if we incessantly ignore checking it and change it during our reading, this can reduce the life of the clamp meter.
Additionally, the risk of getting shocked is also there.
3. Ignoring the rating of the clamp meter
It is the most occurring error. We do not check the rating of a clamp meter before using it. This can damage the clamp meter in two ways.
First, the clamp meter can stop working. It is because of overload. This damages our clamp meter and hurts us economically.
Second, the safety is compromised. If we are boldly using a clamp meter of CAT-III in the wiring of the CAT-IV, some serious damage can occur.
4. Carelessness in connecting the clamp Jaw
After opening the jaw properly, always connect the clamp around the wire. Do not let the conductor of the jaw clamp touch the wire. It can damage the circuitry of the clamp meter.
However, we sparsely have any reports about the life threat. The damage happens to the circuits. Then folks complain about the faulty instrument.
Remember, the clamp jaw is electromagnetically connected with wire, not electrically. Upon connecting it electrically, the clamp meter can stop working.
Always keep track of the above factors in mind before using a clamp meter.
Conclusion
A clamp meter is a simple instrument that helps us to measure current through a non-invasive method. It not only reduces our workload but also keeps us safe.
However, dealing with electronics is not easy. Likewise, a clamp meter could also pose a potent threat. Hence, it is compulsory to know about the method of its usage.
The only task for its users is to keep the jaw of a clamp meter around the current carrying wire to get the corresponding reading.
However, we must go through the user manual while using a clamp meter. Any shortcut and misusage can lead us to serious trouble.
Be safe and follow us for more information about different electronics.
Other useful posts: