
A clamp meter is an advanced instrument. It helps to measure current accurately and reduces the work effort of users. We can also use it for other electrical parameters and find it efficient for them.
Hence, the best clamp meter is always in demand for its accurate measurement and advanced safety. Moreover, an excellent clamp meter is long-lasting and durable.
To get the best clamp meter, we must check a clamp meter for several tests. Commonly, we test a clamp meter on some known current and reference values, checking practical range, testing its other functions, repeatability of measurement, and comparing it with a calibrated clamp meter. Users can repair a clamp meter by contacting its brand, using the user manual, and fixing any physical and electrical damage.
On account of these steps, let’s study in more detail about testing and repairing a clamp meter.
How to Test and Repair a Clamp Meter?
A good strategy for testing and repairing a clamp meter is to contact an expert. It can reduce our work effort and help us financially. However, a layman can also perform these tests and repairs.
It is strictly advised to refrain from performing any measurement through untested instruments. Always check an instrument before using it.
Most Occurring Problems With a Clamp Meter
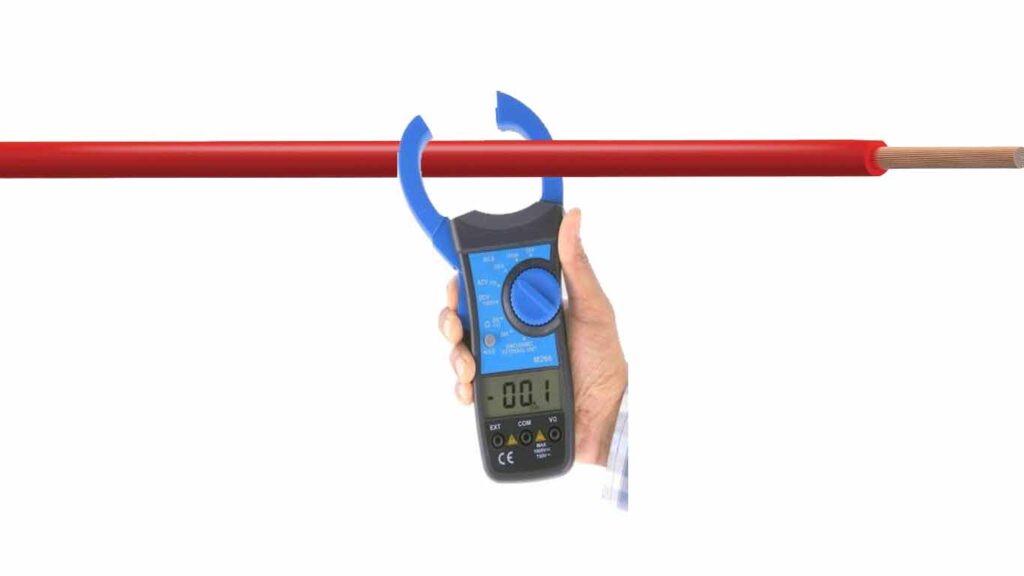
The clamp meter is an essential instrument for safe and accurate measurement of the current. Especially, the non-invasive method of measuring current provides safety to users.
However, like every electronic instrument, a clamp meter also fails to work in some cases. The problem may occur due to the following reasons:
- Damage in internal circuits
- Electromagnetic interference
- Physical damage
- Faulty probes
- Manufacturing fault
These four failures trigger many problems. Let’s discuss each one by one.
1. Inaccurate Reading and Autoranging
A clamp meter measures current with maximum accuracy. Due to physical damage, internal circuits are affected. This not only leads to faulty reading but also to disturbing the smooth operation.
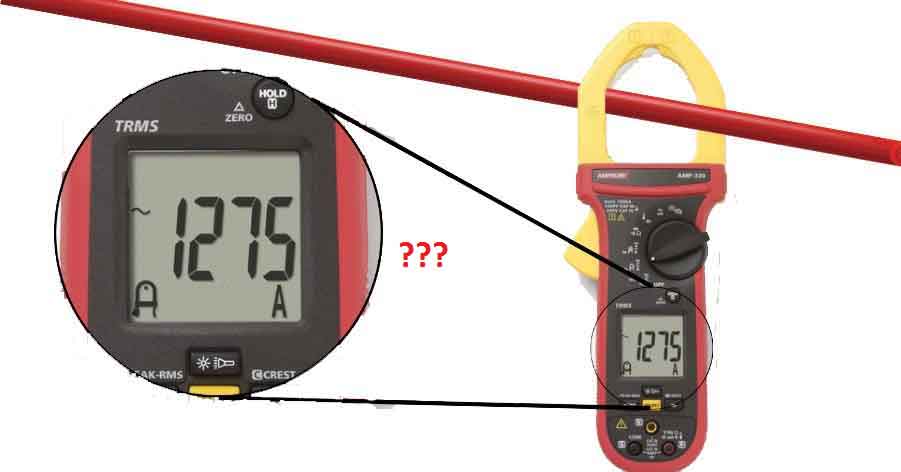
Additionally, the internal circuitry damages lead to failure in auto-ranging. We have also witnessed the same difficulty with manual ranging.
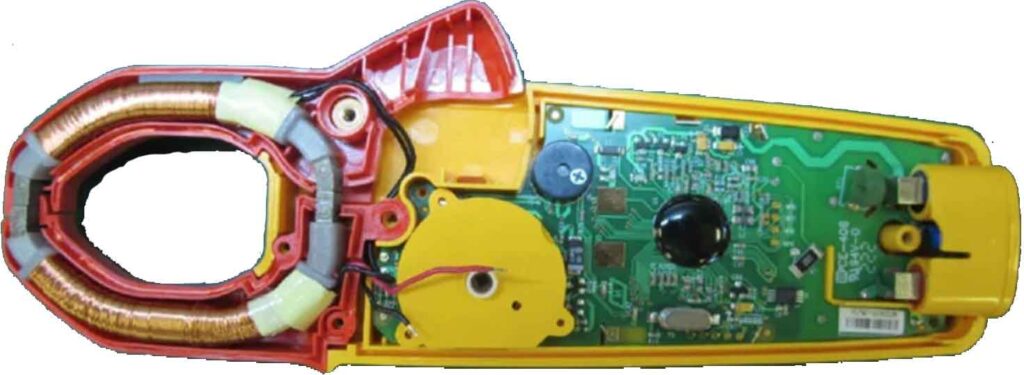
2. Jaw and Display Damage
Flickering in display is a widely known issue in electronic instruments. Commonly, changing batteries solves the problem, but sometimes the Issue happens because of damage to the display due to humidity or fall.
The physical damage misplaces the connecting point of the clamp jaw. Hence, the operation of electromagnetic induction produces errors in reading.
3. Moisture Damage
Electronics do not have a good relationship with moisture. As we know impure water (moisture) is a good conductor. Hence, the additional path for current flow is provided in internal circuitry.
This results in temporary damages that can lead to permanent damages. The prime target of this fault is the LCD of the clamp meter.
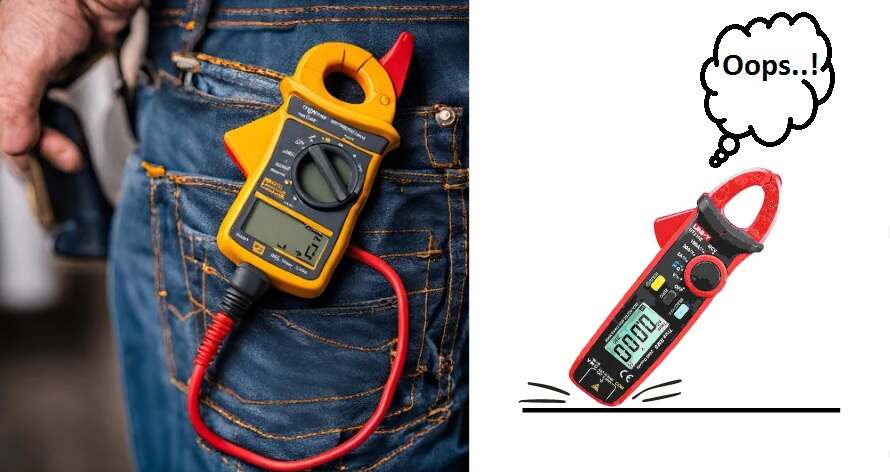
4. Environmental Effects
Fieldwork requires a specific clamp meter. These clamp meters can withstand the harsh temperatures, humidity, and pressure of workspaces. Hence, the durability of a clamp meter is essential in this case.
In this regard, we have written a blog that suggests the best clamp meter for the task. Here is the link.
Best Clamp Meter for Electricians
5. Interference and Low-quality Probes
Electromagnetic interference is a huge issue with the clamp meters. A low-quality clamp meter can easily be distracted by the passing-by magnetic fields. We recommend getting a clamp meter proposed by an expert.
It is essential to check the quality of probes, their proper connectivity with a clamp meter, and their physical status. Always check probes for wear and tear.
These are some commonly occurring problems with clamp meters. There might be more, but we listed these frequently occurring ones.
Testing a Clamp Meter
Before getting a clamp meter, we can perform several tests to check the quality of the clamp meter for our use. Always remember that we should perform these tests during the warranty period.
Commonly, a month is given to test the clamp meter. During this month, we can check the performance of a clamp meter. The following are a few essential tests to perform on a clamp meter.
1. Physical Condition Test
It is a common practice to check a clamp meter physically. We can perform different non-operation tests by just holding a clamp meter. As a whole, we call it the physical condition test.
We check the following objectives from a physical condition test:
- Physical damage
- Jaw damage
- Pushbutton failure
- Display condition
- Probes status
- Weight and dimension (according to manual)
- Batteries holder (check for rust)
Upon checking these points, we can certify the physical integrity of a clamp meter. Bad delivery, bad handling, and inefficient manufacturers can cause these damages.
2. Reference Tests and Calibration
After we are satisfied with the good physical condition, we will start tests to check the measurement capability of a clamp meter. For this purpose, we perform two tests:
- Measuring a known value of all electrical parameters
- Comparing the reading of a test clamp meter with a standard and trusted clamp meter.
These tests tell us whether the test clamp meter measures electrical parameters according to its manual or not. Moreover, the accuracy can be checked by repeatedly performing these tests.
3. Range Test
The range of all electrical parameters can be checked by testing a clamp meter against known values. We test the range of current, voltage, resistance, temperature, and other provided functions through this method.
We can also use another standard clamp meter for the same purpose. The measured values of both are compared and checked for any error.
4. Interference Test
Electrical and electromagnetic interference are the most common problems with a clamp meter. Electrical interference is caused by damaged internal circuitry.
However, electromagnetic interference may occur due to poor quality of the clamp meter or internal circuitry.
For this test, calibration and measuring of known electrical parameters helps to troubleshoot the issue.
These are some common tests for a clamp meter. After going through all, we can use the clamp meter in a field. Now, let’s understand how we can repair a clamp meter with the same issues.
Repairing a Clamp meter
It is always advised to contact the supplier or manufacturer in case of any issue with a clamp meter. An expert engineer or electrician in the field can also help to resolve the concern.
1. User Manual
However, a common person with little knowledge can repair a clamp meter by simply going through the user manual of a clamp meter.
The user manual of a clamp meter is provided with sufficient knowledge of a clamp meter. Through it, we can easily fix a small issue. Moreover, safety precautions are also mentioned in these user manuals.
2. Diagnosis
Our first step in repairing a clamp meter is to observe and diagnose the issue. Once, we understand the issue, we can resolve it through the user manual or the brand’s helpline.
Besides, we can also contact an expert of the manufacturing brand to diagnose and resolve the issue.
3. Battery Fixing
Often, the issue occurs due to the batteries. Either batteries are displaced or the holding area is rusted. We can resolve the problem by removing the rust and fixing the batteries.
We advise you to have batteries of a good brand to get your clamp meter healthy and efficient.
4. Removing Humidity
If a clamp meter falls in water or is affected by humidity, remove the batteries as soon as possible. Next, remove water particles through the hair dryer and ensure dryness before returning the batteries.
Humidity forms rust in the key parts of the internal circuit. The rust can cause also cause heating besides short-circuiting.
5. Replacing Probes
The probes and their sockets are important. Always check their condition. Often bad readings are displayed because of low-quality probes or rust in sockets.
Rusty socket impacts the accuracy of measurement. The joining junction of the clamp jaw forms rust in very rare cases. This issue is specific to probes.
6. Checking Software
If the issue in a clamp meter is consistent, and we cannot resolve it through the above tests, contact the manufacturers. It is because of outdated software/firmware.
Manufacturers will fix it according to their policies and conditions. For this purpose, keep visiting their websites for new updates.
Conclusion
Being an electronic instrument, a clamp meter is also prone to many issues. Inaccurate reading, physical damage, moisture damage, harsh conditions, and interference are common problems of a clamp meter.
A clamp meter works best when calibrated and tested on some known values of electrical parameters. But we must check a clamp meter’s physical condition before buying it.
The capability of a clamp meter is essential to check before using it in the field. Hence, the range and safety of a clamp meter must be checked through a proper electrical source.
In case we do not know the problem. We can contact the manufacturer or expert. This will save us time against digging more to find issues.
However, we can resolve some issues by checking the user manual of a clamp meter and tackling the obvious issues like battery failure, rust, and humidity. Outdated software can also result in a fault in a clamp meter.
Other useful posts: